
DIY faux-capiz-shell lampshade

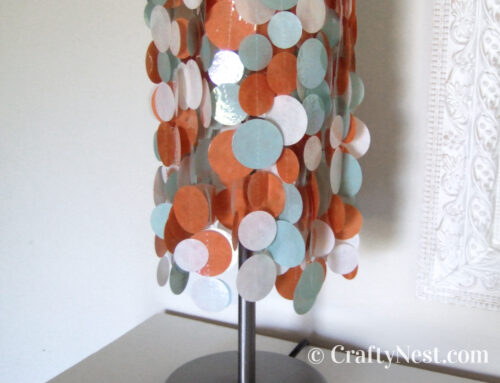
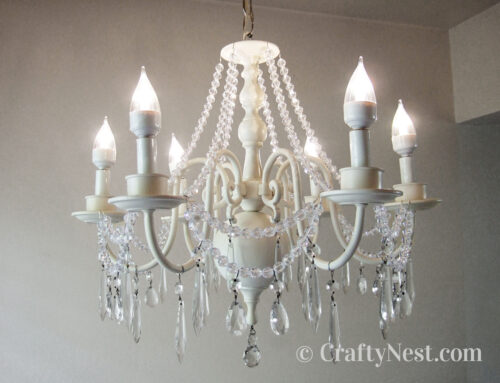
Some of you may remember my first faux capiz shell lampshade that I made for Sunset magazine. It was originally inspired by West Elm’s popular capiz table lamp (below). I was going for the mod look, but multicolored just isn’t my style. Plus I discovered, after two years of use, that colored rice paper fades. The white circles still look beautiful, however, so I decided to redo it in all white. I used a different type of thread this time (white polyester instead of clear nylon thread), which made all the difference. Overall this new lampshade is easier, cheaper, and classier than my first attempt — if I do say so myself.

Above is West Elm’s capiz table lamp (no longer available), which inspired this project.
How to make a faux capiz shell lampshade
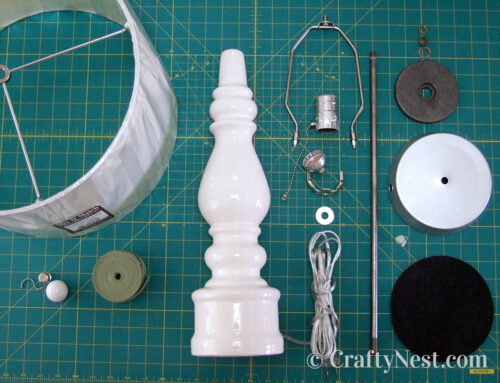
SUPPLIES
TOOLS
INSTRUCTIONS

1. You can skip this step: I took apart my old lampshade to salvage the white circles. I discarded the colored circles.

2. First, punch some circles. From experience, I knew I needed 180 circles of each size. Your quantity will depend on the diameter of your shade and the height you want your shade to be.

3. Sew the circles together with your sewing machine. I used a small-medium-large sequence of 18 circles for each strand. Feed each circle through one-by-one. Use your longest stitch length. Let the machine stitch once in between each circle. Back-stitch a couple times at the first and last circle in each strand. Trim the excess threads.

4. Fold each strand in the middle and drape it over the lampshade ring.
5. Continue to hang all the strands (I made 30) and space out evenly. You’re done.

Share this story
Reader Gallery
Made this project? Email your photo(s) to monica (at) craftynest (dot) com, and I’ll share your version here!
Leave A Comment